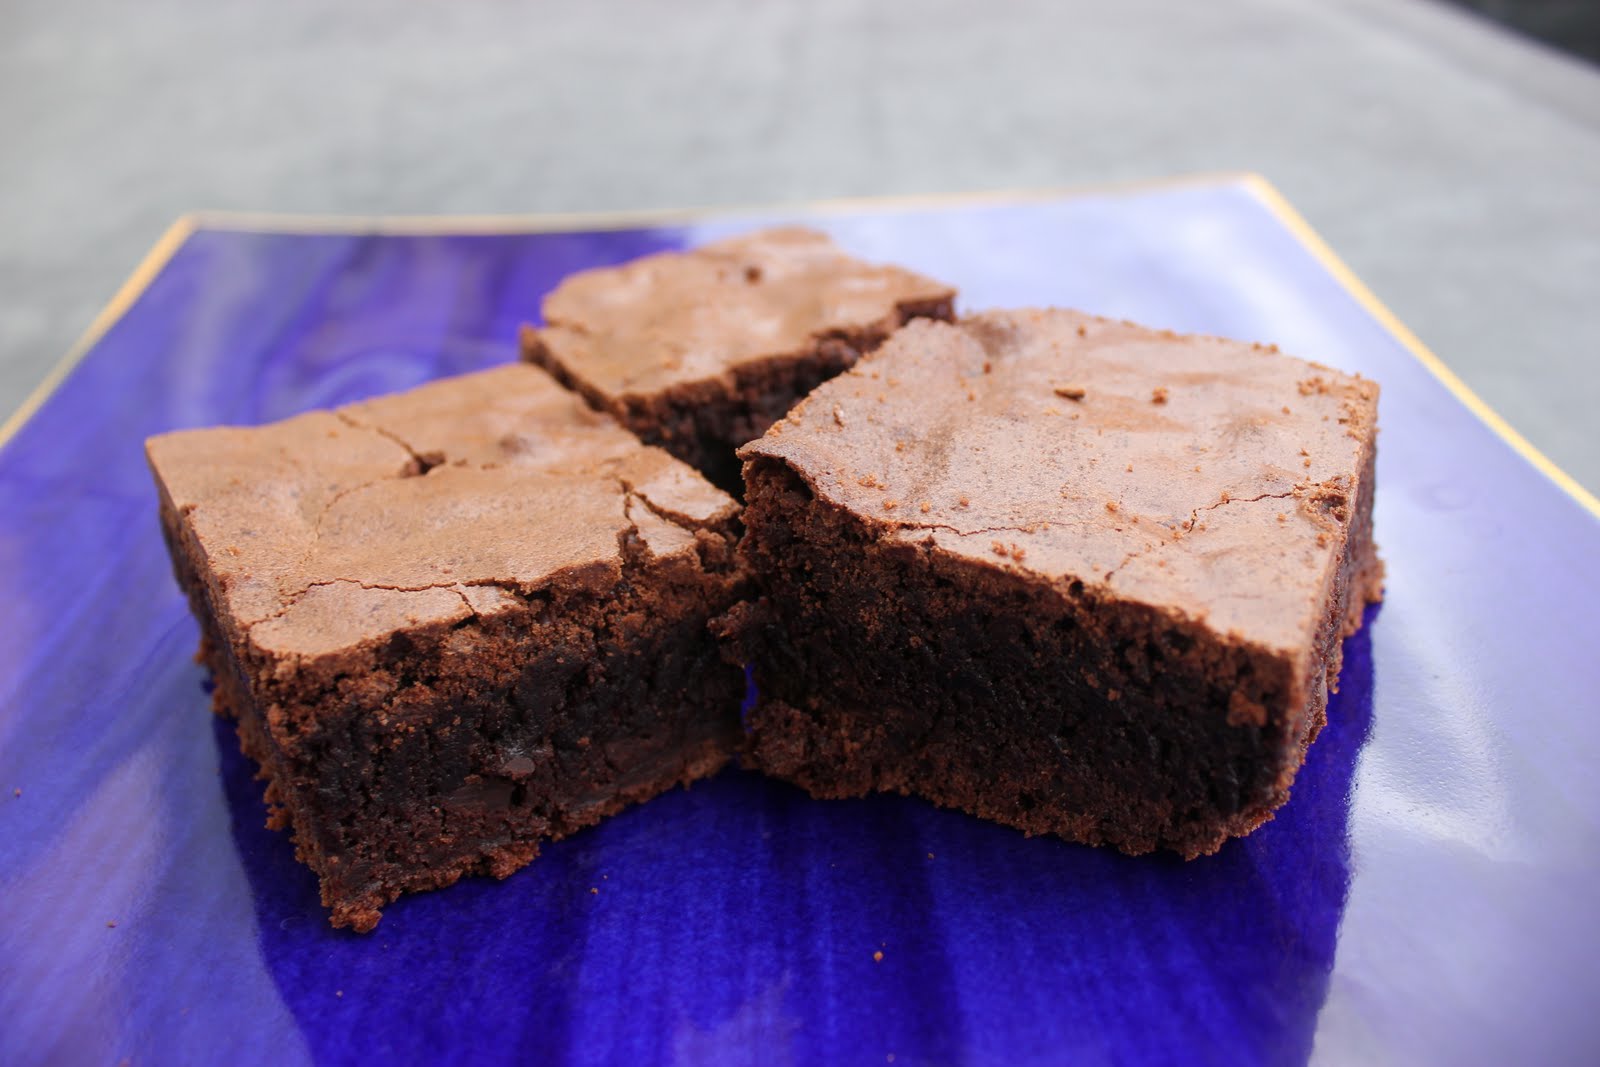
When I feel like really indulging, I make chocolate sauce. It's so easy to make and it keeps well if you don't quite eat it all (but let's be honest, how often does that happen!).
The beauty of my chocolate sauce is its versatility. Really, the only thing you really must have is chocolate!
So, my ultimate chocolate sauce recipie would be the following:
Dark chocolate (as a rule, I use Whittakers, 70%, but if you wanted a less intense sauce, you could use milk chocolate)
Cream
Marshmallows
Rum/brandy
Vanilla
Butter
Now, you're going to ask, how much of everything? Good question. I generally make it up as I go, but because I knew I would be asked, I measured everything out (kind of). Again, this is so flexible, you won't go wrong with adding a bit more or a bit less.
You want about 200g chocolate, 1/2 cup cream (if you want your sauce thinner, add more), a handful of marshmallows (the more you add the more gooey it will be - delicious), about one tablespoon each of alcohol/liqueur and vanilla, 50g butter.
I cook my chocolate sauce over a water bath (a bowl on top of a pot of simmering water). I plonk everything in, and just gently melt it all together. Make sure you give it a good stir as it melts.
When it has all melted together, lather it over ice cream, brownie, or whatever takes your fancy really.
Triple chocolate ice cream with chocolate sauce? Don't mind if I do!
Labels
Showing posts with label Chocolate. Show all posts
Saturday, 6 October 2012
Friday, 24 February 2012
Chocolate marshmallow drizzle cookies
I'm addicted to trying anything new. If the packaging proclaims it's "new", I'm drawn like a magnet to it. I just have to try it. This compulsion does have a down side as sometimes these experiments are downright yuck (like the "natural sugar" German energy drink I spotted in the vending machine at work the other day - give me real sugar any day). But, at least I know. More often than not however, I discover something delicious to add to my pantry.
This week I discovered Pascal Swirl Marshmallows. There were two "new" flavours at New World - berry and caramel. I had to try the caramel.
I guess I do have disclose something here: in my opinion no other marshmallow compares to Pascal marshmallows. I only buy Pascal marshmallows, and I generally only eat the white ones. (OK, so I'm an incredibly fussy marshmallow eater). These new caramel marshmallows were pretty good. They have the same delicious Pascal texture, the thing I love the most about them.
I tried to take a photo, but the Wellington wind thwarted any attempts at getting a decent photo. I did manage to get it, even if it's a bit skewed!
I decided caramel would be the perfect addition to chocolate cookies.
I saw these cookies and decided I had to try them. They are adapted from a recipe from Martha Stewart. I followed Martha's recipe, but drizzled chocolate over rather than icing them, because I decided it would be better, as well as easier.
My only criticism of the new swirl marshmallows would be that their shape does not lend them as well to melting as the traditional marshmallow shape. I had to help them out a little by pressing them down gently.
When I served these cookies up that day after baking them, I heated them in the microwave beforehand. What a great idea! Oozy, warm, melting chocolate goodness. Delicious.
Sunday, 8 January 2012
Christmas treats
Christmas time always means lots of delicious treats. I had so much fun creating these Christmas treats.
First up I made a boiled Christmas pudding and a Christmas Cake. I'll blog about those later, the cake especially was amazing. The recipe was given to me by a friend, and I think it's totally worth sharing (i'm sure she won't mind).
Anyway, I made mini Christmas cakes, and I had way too many so I decided to make some little Christmas truffles.
I made a couple of batches of these truffles. For both I whizzed up the cake as my base. For the first lot I added coconut, melted chocolate and a good slosh of rum (brandy or sherry would also be tasty) and rolled them into balls. For the second lot I added the coconut and rum, but dipped them in melted chocolate rather than adding it to the mixture. I topped both with some melted white chocolate and red and green decorations. (I used chopped up jet plane lollies).
Next on my list of treats was mini fruit mince pies. I made my own fruit mince by whizzing up mixed fruit, sultanas and currants. (I generally use whatever I have. Prunes and raisins also work well.) To this I added a grated apple, a little brown sugar, orange rind and juice, and lots of spices - ground cloves, cinnamon, mixed spice, and whizzed it up some more. Lastly add lots of brandy. Enough to make it a good moist consistency. If you are going to store it (it keeps for months in the fridge) you can be really generous with the booze as the fruit will soak it all up. If you want alcohol-free fruit mince, just use orange juice and omit the sugar.
A pastry star and a sprinkling of icing sugar on the top of my pies made them all very festive!
Sharing the plate with my fruit mince pies are Nigella's Chocolate Peanut Butter Cups. These are seriously so good, and so easy to prepare. Whiz everything up, press them into tiny cases and top with melted chocolate. Yummo! I dusted mine with edible giltter to make them all sparkly.
I also made some festive cookies.
These were really fun to make. I used a cookie recipe from my German Christmas Cookies recipe book. Mix together 300g flour, 250g softened butter, 100g sugar, 100g ground almonds, 1tsp cinnamon, 1tsp cocoa, 1 dessert spoon ground cloves. Chill this in the fridge and then roll out and cut into shapes. I wasn't a huge fan of these cookies, but I took them to work and they disappeared within minutes! One of my workmates commented that they resembled Dutch spice cookies.
First up I made a boiled Christmas pudding and a Christmas Cake. I'll blog about those later, the cake especially was amazing. The recipe was given to me by a friend, and I think it's totally worth sharing (i'm sure she won't mind).
Anyway, I made mini Christmas cakes, and I had way too many so I decided to make some little Christmas truffles.
I made a couple of batches of these truffles. For both I whizzed up the cake as my base. For the first lot I added coconut, melted chocolate and a good slosh of rum (brandy or sherry would also be tasty) and rolled them into balls. For the second lot I added the coconut and rum, but dipped them in melted chocolate rather than adding it to the mixture. I topped both with some melted white chocolate and red and green decorations. (I used chopped up jet plane lollies).
Next on my list of treats was mini fruit mince pies. I made my own fruit mince by whizzing up mixed fruit, sultanas and currants. (I generally use whatever I have. Prunes and raisins also work well.) To this I added a grated apple, a little brown sugar, orange rind and juice, and lots of spices - ground cloves, cinnamon, mixed spice, and whizzed it up some more. Lastly add lots of brandy. Enough to make it a good moist consistency. If you are going to store it (it keeps for months in the fridge) you can be really generous with the booze as the fruit will soak it all up. If you want alcohol-free fruit mince, just use orange juice and omit the sugar.
A pastry star and a sprinkling of icing sugar on the top of my pies made them all very festive!
Sharing the plate with my fruit mince pies are Nigella's Chocolate Peanut Butter Cups. These are seriously so good, and so easy to prepare. Whiz everything up, press them into tiny cases and top with melted chocolate. Yummo! I dusted mine with edible giltter to make them all sparkly.
I also made some festive cookies.
These were really fun to make. I used a cookie recipe from my German Christmas Cookies recipe book. Mix together 300g flour, 250g softened butter, 100g sugar, 100g ground almonds, 1tsp cinnamon, 1tsp cocoa, 1 dessert spoon ground cloves. Chill this in the fridge and then roll out and cut into shapes. I wasn't a huge fan of these cookies, but I took them to work and they disappeared within minutes! One of my workmates commented that they resembled Dutch spice cookies.
Friday, 21 October 2011
Just some of my cupcakes
I experimented with cupcake decorating the other day, so thought I would share them on here.
Firstly, chocolate ganache, a star and glitter. This is probably my favourite.
Chocolate buttercream and some silver sparkly balls.
Red buttercream swirl.
A selection of chocolate buttercream with hand-made decorations.
Coconut and a heart.
Red with a decoration.
Firstly, chocolate ganache, a star and glitter. This is probably my favourite.
Chocolate buttercream and some silver sparkly balls.
Red buttercream swirl.
A selection of chocolate buttercream with hand-made decorations.
Coconut and a heart.
Red with a decoration.
Monday, 17 October 2011
Chilli chocolate brownie
It's chocolate challenge time again, thanks to Chocolate Teapot and We Should Cocoa .
This month's challenge was chill.
I have the best recipe for chocolate brownie, and decided this was the perfect time to experiment with it a bit. I'm not sure of the origin of this recipe, it came to me from a friend and a workmate give it to her. It makes an enormous amount of brownie, so unless you have a small army to feed, I would recommend halving it.
330g butter
1 1/4 cups cocoa
1/2 tsp vanilla
2/3 tsp baking powder
2 cups chopped chocolate or chocolate chips
3 1/2 cups sugar
7 eggs (use 4 if halving it)
1 1/4 cups flour
1/4 tsp salt
Melt butter. Pour in cocoa and mix to combine. Add sugar, eggs and vanilla. Mix on high speed until the colour lightens (approx 5 mins). Add flour, baking powder, salt and chocolate chips and mix until just combined. Pour into a large, lined baking dish and bake for one hour and 10 mins at 160 degrees celsius.
To make the chilli brownie, I added about a heaped teaspoon of chilli. I made it a bit hotter than I thought it should be, as I thought the heat would bake out slightly once cooked. Turns out it didn't! But, I actually thought it was pretty good.
It received mixed reviews at work, from "awesome" and "delicious" to "Carina, I love your baking, but that was terrible". Turns out he is not a fan of chilli. I did warn everyone! If you're not a fan of chilli, I would still recommend making this brownie, as it's so tasty.
This month's challenge was chill.
I have the best recipe for chocolate brownie, and decided this was the perfect time to experiment with it a bit. I'm not sure of the origin of this recipe, it came to me from a friend and a workmate give it to her. It makes an enormous amount of brownie, so unless you have a small army to feed, I would recommend halving it.
330g butter
1 1/4 cups cocoa
1/2 tsp vanilla
2/3 tsp baking powder
2 cups chopped chocolate or chocolate chips
3 1/2 cups sugar
7 eggs (use 4 if halving it)
1 1/4 cups flour
1/4 tsp salt
Melt butter. Pour in cocoa and mix to combine. Add sugar, eggs and vanilla. Mix on high speed until the colour lightens (approx 5 mins). Add flour, baking powder, salt and chocolate chips and mix until just combined. Pour into a large, lined baking dish and bake for one hour and 10 mins at 160 degrees celsius.
To make the chilli brownie, I added about a heaped teaspoon of chilli. I made it a bit hotter than I thought it should be, as I thought the heat would bake out slightly once cooked. Turns out it didn't! But, I actually thought it was pretty good.
It received mixed reviews at work, from "awesome" and "delicious" to "Carina, I love your baking, but that was terrible". Turns out he is not a fan of chilli. I did warn everyone! If you're not a fan of chilli, I would still recommend making this brownie, as it's so tasty.
Saturday, 8 October 2011
Becci's birthday and a pony cake
My friend Becci had a birthday this week and requested a pony cake. She is nuts about horses, is a keen rider and has her own beautiful pony (although the unfortunate fellow does have a girl's name). A standing-up pony was initially requested - a feat I declared out of my scope! Becci persisted, and sent me this link for a pony cake. So, a pony cake it was!
I baked my favourite chocolate cake from Annabel Langbein (see previous post for the recipe) in two round tins. Halfway through making the cakes, I discovered I had run out of flour (and I call myself a baker, tsk tsk!). So, I needed a substitute (it was about 9.00pm, I could not be bothered going out in the dark and cold to get more flour if I could help it). What's the lesson here - always read the recipe through and check you have everything you need before you start! I had wholemeal flour, so decided to give that a go. I think it worked pretty well, the cake had a lot more texture than usual due to the course nature of wholemeal flour, but I think it was slightly more dense than usual, which I liked.
Anyway, the following evening I turned the cakes into a pony using the template above. This is when I discovered my next problem, and decided that I really do need to learn to plan ahead better. I went to put the cut-out shape onto my cake carrier to decorate it, only to discover that it didn't fit! The only thing I could find that it would fit on was my massive roasting tray, and there was no way I was carrying that on the train to work the next morning! The only thing to do was to put the pony on a rapid weight-loss diet.
I trimmed everything up, and made him fit on the carrier. The only downside of this exercise was that I ended up turning the pony into more of a dog. His neck was the main problem - horses have long necks. So, his neck got a reasonably brutal trim, and he lost a bit of his horsey-ness. Not to worry. I iced him with chocolate buttercream and used some black food colouring to create a tail and mane. I think the tail and the mane looked pretty cool, I was really pleased. Pony was supposed to have a blanket. But, I spent such a long time fluffing about with the weight-loss regime, and it got too late to sort out a blanket - it was well past my bed time! I did give him some feet though by mixing some of the darker icing with the lighter to give his feet a bit of a shadow effect.
According to Becci, the cake was yum, so as long as the birthday girl enjoys it, that's the main thing!
Sunday, 11 September 2011
Mel's Birthday Cake plus a chocolate challenge
My little sister had a birthday earlier this month and asked for a cake. Of course, I was happy to oblige. Just before I made the cake, my friend alerted me to something she thought I might like - a blog with a chocolate challenge. Chocolate Teapot and We Should Cocoa are the two blogs that host the monthly challenge. I instantly thought a chocolate challenge sounded like a fantastic idea! I was then stoked to discover that this month's challenge was a chocolate masterpiece fit to celebrate We Should Cocoa's 1st virtual birthday party. Well, I decided to create a fantastic chocolate birthday masterpiece! What better than a spectacular black forest gateau. I started with a chocolate cake recipe from Annabel Langbein. This is seriously such a great recipe - super easy and so tasty. I cooked it in two round cake tins and left them to cool overnight. The next day was assembly time. I split each cake in half, and bought a jar of morello cherries from the supermarket - I was amused to see they originated from Turkey. Anyway, I whipped some cream and started layering. The first layer was cream and cherries, the next cream and shaved chocolate, the next a mixture of cream, cherries and chocolate. Yum. I covered the cake in cream - I did two layers to avoid crumbs as I didn't want any of them messing up my cake! On top, I piped some large swirls of cream around the edge of the cake for a cherry each. I wanted it to look quite spectacular, so I made some chocolate shavings. I did this in a rather rudimentary way - by pouring melted chocolate directly onto my (clean) bench and spreading it out thinly. Once cold (I aided this process by opening the window above the bench - the Wellington winter breeze certainly helped) I scraped the chocolate shavings using a metal bbq slice. A little random, but whatever works! I needed something strong enough to withhold the pressure to create the curls. I also made some chocolate shapes to decorate the cake. I piped the melted chocolate onto baking paper and let it set. I just used creative flair to make the shapes - swirls and lines and sweeps, great fun. I piled the chocolate shavings in the middle of the cake and nestled the shapes around the edge. I also piped Mel to sit in the centre of the cake. Around the edges I covered the cake in more chocolate shavings. The finished result? In my opinion, awesome!! Apparently it went down well with Mel's workmates too :)
Saturday, 27 August 2011
Chocolate-Espresso Snowcaps
I love Martha Stewart. Her website is in my favourites and I constantly check it out for ideas and inspiration.
I also love to watch Everyday Baking with John Barricelli. Does this guy have one of the best jobs in the world? Baking for Martha Stewart, wicked.
Anyway, I was watching Everyday Baking the other day and John Barricelli made Chocolate-Espresso Snowcaps, which I thought looked delicious. And they were.
The recipe calls for the mixture to be frozen before baking. I didn't have time for that (I didn't read the recipe properly and only realised this when I got to this step.) So, I just chose to ignore that instruction. And it was fine.
They are a really fudgy, soft cookie. Very moreish and easy to eat! They are also very pretty and make an attractive addition to a morning tea (as was my reason for making them). The feedback from my workmates and our guests was all positive. A definite make-again.
I think they could be easily modified - omit the coffee, dust in cocoa rather than icing sugar (for a less-sweet cookie), flavoured chocolate etc. Although, they taste great just as they are! Enjoy!
I also love to watch Everyday Baking with John Barricelli. Does this guy have one of the best jobs in the world? Baking for Martha Stewart, wicked.
Anyway, I was watching Everyday Baking the other day and John Barricelli made Chocolate-Espresso Snowcaps, which I thought looked delicious. And they were.
The recipe calls for the mixture to be frozen before baking. I didn't have time for that (I didn't read the recipe properly and only realised this when I got to this step.) So, I just chose to ignore that instruction. And it was fine.
They are a really fudgy, soft cookie. Very moreish and easy to eat! They are also very pretty and make an attractive addition to a morning tea (as was my reason for making them). The feedback from my workmates and our guests was all positive. A definite make-again.
I think they could be easily modified - omit the coffee, dust in cocoa rather than icing sugar (for a less-sweet cookie), flavoured chocolate etc. Although, they taste great just as they are! Enjoy!
Sunday, 22 May 2011
Banana Peanut Butter Cake
I made myself a birthday cake today (it's a bit rough when you have to make your own cake!) Inspired by my friend Susan who regularly has peanut butter and banana on toast, I decided to make a banana peanut butter cake. I used a basic banana cake recipe and put a little less banana and added some peanut butter.
The result - yum!
I iced my cake with chocolate peanut butter ganache. I put some cream on the stove with chocolate, butter and peanut butter. Once the cream was almost bubbling, I removed it from the heat and whisked until everything was combined. I didn't quite have enough (I ran out of cream), so I added a bit of icing sugar to bulk it up.
Chocolate and peanut butter really are good friends. Turns out, banana and peanut butter also are too!
The result - yum!
I iced my cake with chocolate peanut butter ganache. I put some cream on the stove with chocolate, butter and peanut butter. Once the cream was almost bubbling, I removed it from the heat and whisked until everything was combined. I didn't quite have enough (I ran out of cream), so I added a bit of icing sugar to bulk it up.
Chocolate and peanut butter really are good friends. Turns out, banana and peanut butter also are too!
Sunday, 8 May 2011
Chocolate, banana and almond meal cupcakes
A few weeks ago, I had a few bananas to use up. A workmate had recommended I check out her favourite food blog and on it I found a recipe I thought I might try. It's such a beautiful blog, with wonderful photos.
Anyway, I found some gluten free cupcakes on her website and decided to give them a go. As ever, I didn't follow the recipe exactly, but you can find it here.
I had three bananas, which was more than the recipe called for, but I wanted to use them up. I used regular flour, brown sugar, omitted the rice flour and used 100g of almond meal.
The result was delicious. A lovely almost fudgy cupcake. I sent them to work with my other half and had interesting and very exciting feedback. Some could not taste the banana, which surprised me. Nevertheless, they said they really liked them. One workmate even said he would happily pay for them. Now, that is awesome feedback!
I iced them with chocolate icing, and added a touch of edible glitter to pretty them up.
Friday, 8 April 2011
Easy, delicious white chocolate cheesecake
Sticking with the white chocolate theme, this is simply the best cheesecake! It's so easy to make (well, relatively easy), and is certainly a favourite of mine. I found it by accident, in a newspaper or magazine one day several years ago. It's a great special occasion, or dinner party dessert. But really, you don't need an excuse!
The recipe says it will keep for up to a week in the fridge, though you would be doing well to resist for that long! However, you do need to make it the day before so it's well chilled when you want to eat it. I top with whatever I have: chopped fruit; tinned fruit; chocolate shavings; passionfruit syrup is particularly delicious.
Due to popular demand, I will start posting recipes as well, so here goes for the cheesecake:
450g cream cheese
1/4 cup caster sugar
3 t cornflour
3 eggs
1 t vanilla essence
3 t finely grated lemon zest
1 1/2 T lemon juice
2 cups sour cream
1 cup cream
220g white chocolate, melted and cooled to lukewarm
Preheat oven to 180 degrees C. Grease a 20cm springform cake tin and line the base with baking paper. Wrap the outside tightly in a double layer of foil.
Whiz cheese and sugar in a food processor for 30 seconds until smooth. (I don't have a food processor, so I use my hand beater and just make sure it's really well mixed). Keep the motor or beater going, and add the cornflour, then eggs one at a time, stopping every now and again to scrape down the sides. Add vanilla, zest, juice, creams and 1/4 t salt, and process until just combined scraping down the sides. Add chocolate and pulse until smooth. Pour into tin and sit in a large baking dish. Pour hot water into the dish to come halfway up the sides of the tin. Bake for 45 minutes and then leave in the switched-off oven (door closed) for 1 hour. Remove the tin from the dish, remove the foil and cool the cake in the tin on a rack. Cover and chill overnight.
To turn it out, sit the tin on a hot damp towel to loosen the base. Run a palette knife around the edge of the tin, then invert onto a serving plate. Decorate and slice with a hot knife.
Enjoy!!!
Wednesday, 6 April 2011
Spectacular white chocolate cake
Spectacular is not usually a word I use. But, I made this cake for my partner to take to work, and spectacular is the word he used to describe it. Now, to put this in perspective, my darling partner is not usually one for superlatives. However, to be fair, this was a mighty tasty cake.
For white chocolate lovers, I don't think you can get much better. All up, this cake (including icing), has almost 1kg of white chocolate! Yum!
The feedback I received from the other workmates was also favourable - "best so far", "very moist", "you should open a cafe". I was chuffed!
I was impressed by how deliciously moist the cake was. It was a couple of days old by the time I got around to icing it and sending it off with my partner, and it just seemed to improve with age.
I iced the cake with a white chocolate ganache and coated the edges with white chocolate shavings. I made the shavings using a potato peeler, running it along the long edge of a block of chocolate. In the centre of the cake, I mixed white chocolate ganache, whipped cream and Baileys. Yum!
Unfortunately the photos did not come out that well, but I can assure you it was pretty amazing!
Subscribe to:
Posts (Atom)